


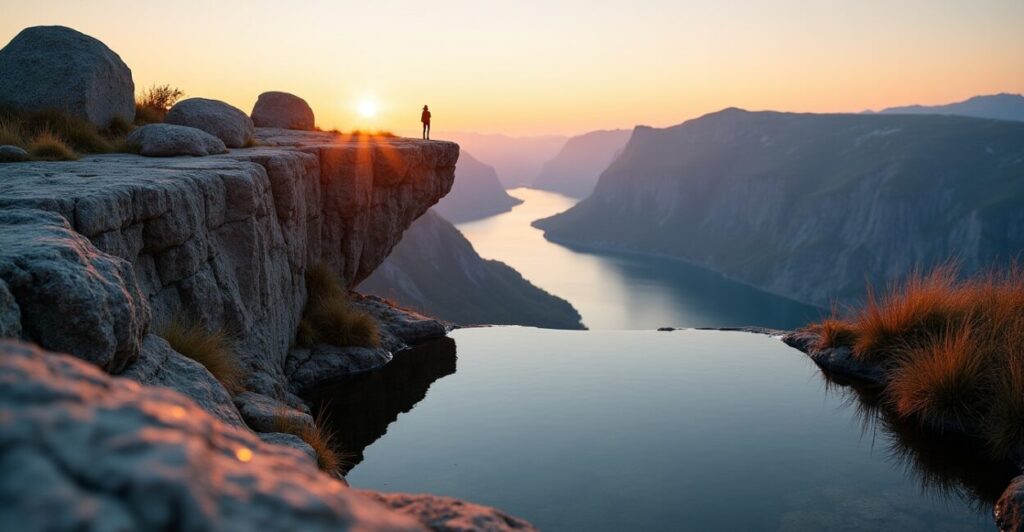
The Trolltunga hike is a world-famous alpine trek in Norway that leads to a dramatic rock ledge over Ringedalsvatnet. It’s important because it offers one of the most iconic photo spots and an unmatched sense of scale and adventure. This guide explains routes, photo angles, safety, and alternative viewpoints to maximize your Trolltunga hike experience.
Today’s outdoor travelers seek unique visuals for social feeds and meaningful, safe experiences. I’ll highlight fresh angles for the Trolltunga hike, secret photo spots on the cliff, and alternative views at Ringedalsvatnet that many hikers miss. Expect practical tips, mobile-friendly structure, and trusted sources to plan your trip.
You’ll discover where to stand for the best light, quieter approaches, what gear truly matters, and how to combine Ringedalsvatnet viewpoints with the classic Trolltunga hike sequence. Read on to capture the moment without risking it.
Essential Overview of the Trolltunga Hike
What the Trolltunga Hike Is
The Trolltunga hike is a steep, long day trek from Skjeggedal or Tyssedal up to a jutting rock over Ringedalsvatnet. It combines alpine terrain, plateaus, and dramatic cliffs with high elevation changes.
Expect variable weather, rocky sections, and several hours each way. The route rewards persistence with a panoramic photo spot and a singular sense of place in Western Norway.
Why the Trolltunga Hike Matters Now
Interest in the Trolltunga hike surged thanks to social media and seasonally improved trail access. Conservation, permit discussions, and local tourism changes make planning essential for a responsible visit.
Understanding timing, safety, and alternative viewpoints at Ringedalsvatnet helps you avoid crowds and leaves a lighter footprint while still getting memorable images.
Planning and Logistics for the Trolltunga Hike
Essential Checklist Before You Go
- Check weather and daylight hours
- Book transport and parking early
- Carry layered clothing and waterproofs
- Bring headlamp, map, and full phone battery
Good planning reduces risk and improves enjoyment. The checklist ensures you don’t scramble at the trailhead or on exposed sections of the Trolltunga hike.
Allow extra time for photos and rest; the slowest sections are often the most scenic. Aim for early starts to catch soft morning light and thinner crowds.
Transport, Timing, and Permits
Most hikers start from Skjeggedal or Tyssedal; shuttle services and limited parking are common. Seasonal closures and parking rules can change, so verify locally before arrival.
Plan for 10–12 hours round-trip in shoulder seasons and more if conditions demand. Some regions encourage guided groups for safety and impact control.
Top Photo Spots on Trolltunga and Creative Angles
Classic Trolltunga Compositions
The canonical shot places a subject centered on the ledge with Ringedalsvatnet below, captured at wide focal length for scale. Golden hour softens shadows and deepens color contrast.
Use low angles to emphasize the cliff’s protrusion and include foreground rock textures. Mind wind and footing; the best angles often require calm conditions for safety.
Less-crowded Creative Frames
Try backlit silhouettes during sunrise to add drama while avoiding peak midday crowds. Frame the cliff with nearby boulders or people to create layered depth on the Trolltunga hike.
Vertical crops work well for phone-first platforms. Capture reflections in small meltwater pools en route for an alternative lead-in image to the main cliff.

Safety, Gear, and Seasonal Advice for Trolltunga Hike
Essential Gear and Clothing
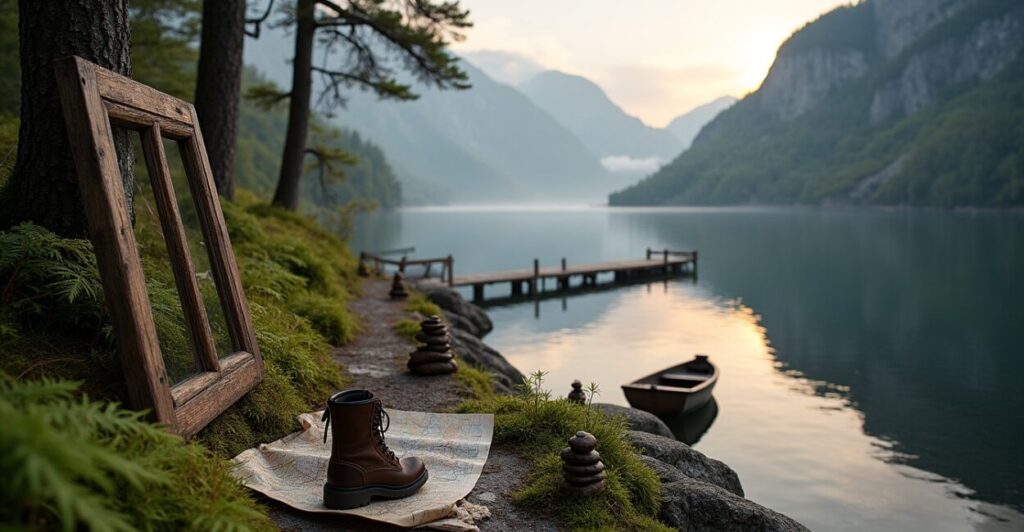
Bring sturdy hiking boots, waterproof layers, trekking poles, and a first-aid kit. A charged phone, power bank, and offline map improve safety on remote stretches of the Trolltunga hike.
In shoulder seasons, crampons and an ice axe may be required. Prioritize breathable insulating layers for changing alpine conditions and long exposures at the viewpoint.
Weather, Timing, and Guided Alternatives
Weather can flip quickly; check forecasts and avalanche warnings. If unsure, join certified guides who know safe lines and pace groups for a better Trolltunga hike experience.
Guided hikes often include safety gear, local knowledge, and photography tips. They help avoid risky improvisation on exposed sections and deliver richer storytelling opportunities.
Alternative Viewpoints at Ringedalsvatnet and Quieter Routes
Top Alternative Viewpoints Around Ringedalsvatnet
- Ringedalskrossen ridge for wide-lake panoramas
- Lesser-known cliffs near the western shore for sunset
- Lower lakeside spots for calm reflections
- Forest clearings on approach for intimate foregrounds
These viewpoints offer fresh perspectives away from the classic ledge composition. They pair well with early or late light to create moodier, less visited imagery.
Combine these stops with the Trolltunga hike to tell a fuller visual story of the landscape, from towering cliffs to tranquil water mirrors at Ringedalsvatnet.
Quieter Hiking Options and Circular Loops
Consider alternative approaches that include boat transfers or longer ridge hikes to reduce time on crowded paths. Some routes add remote viewpoints and quieter plateaus.
Longer loops can reveal different aspects of Ringedalsvatnet and avoid the busiest windows at Trolltunga. These options require extra planning but reward solitude and variety.
Best Times, Lighting, and Photographing Moods
Seasonal Light and Ideal Months
Late June to early September offers stable trails and long daylight. For dramatic skies and fewer hikers, shoulder seasons (May or October) present bold weather contrasts on the Trolltunga hike.
Golden hour enhances textures on the cliff face; overcast days yield soft, even lighting perfect for portraits and moody landscapes. Plan according to your photographic intent.
Composing for Emotion and Scale
Use negative space to emphasize isolation or include a single person to showcase scale. Vertical frames convey height, while wide panoramas communicate vastness over Ringedalsvatnet.
Evoke emotion by shooting from behind subjects looking toward the cliff or lake; this invites viewers into the moment and creates narrative tension in your images.
Photography Workflow and Post-hike Edits
On-trail Workflow and File Management
Shoot RAW for latitude in editing. Back up files during rest stops to a portable drive or cloud when possible. Keep batteries warm and lenses clean in alpine conditions.
Organize shots by exposure and composition priority. Flag keeper frames on your camera to speed post-hike culling and editing for social-first delivery after the Trolltunga hike.
Post-processing Tips for Impact
Enhance contrast and clarity carefully to preserve natural tonal gradation. Use graduated adjustments to even sky exposure and subtle color grading to amplify morning or evening hues.
For mobile-first output, crop vertical variations and optimize sharpness for smaller screens. Deliver a mix of headline images and behind-the-scenes frames to satisfy Google Discover audiences.
Sustainable Practices and Local Respect
Leave-no-trace Tips and Community Impact
Stay on designated trails, pack out waste, and respect local signage. High-traffic seasons stress the landscape; small behaviors protect flora and preserve scenic quality around Trolltunga hike areas.
Support local businesses for transport or guiding. Responsible tourism reduces pressure and fosters community support for trail maintenance and conservation funding.
How to Give Back and Support Conservation
Donate to local conservation groups or participate in volunteer trail projects. Choose certified guides who invest in trail upkeep and environmental education around Ringedalsvatnet.
Share responsible imagery that discourages risky poses and highlights safe, respectful ways to experience the Trolltunga hike. Advocacy improves long-term access and safety.
Planning Table: Quick-reference for Trolltunga Hike
Quick Facts and Decision Table
Use this table to choose timing, gear, and the best viewpoints for different goals—photography, solitude, or family-friendly pacing on the Trolltunga hike.
Keep a screenshot of this table on your phone for on-trail decisions and quick packing checks before the summit push.
| Goal | Best Months | Key Gear | Time Needed |
|---|---|---|---|
| Sunrise photos | June–Aug | Headlamp, tripod | 10–12 hours |
| Fewer crowds | May, Oct | Warm layers, crampons | 12+ hours |
| Family hike | Jul–Aug | Extra food, GPS | 10–14 hours |
Conclusion — Capture the Moment, Protect the Place
On the Trolltunga hike, the view is both a personal achievement and a fragile scene to steward. Returning with great photos matters less than returning with respect for the land and its stewards.
Choose creative angles and alternative Ringedalsvatnet viewpoints to tell a richer story. Plan responsibly, photograph thoughtfully, and leave the place better than you found it.
Faq
How Long Does the Trolltunga Hike Take for an Average Hiker?
The Trolltunga hike typically takes between 10 and 12 hours round-trip for an average hiker, depending on fitness, weather, and photo stops. Expect steep sections, rocky terrain, and stretches above tree line; start early to ensure enough daylight and conserve energy for the return.
What is the Best Time of Year to Photograph Trolltunga?
Late June through early September offers reliable access and long daylight hours, making these months ideal for photography. Shoulder seasons like May or October present dramatic skies and fewer crowds but may require extra safety gear and route knowledge due to lingering snow.
Are There Guided Options for the Trolltunga Hike?
Yes, certified local guides and organizations run guided Trolltunga hikes that include safety briefings, route knowledge, and sometimes photography help. Guided trips suit those unfamiliar with alpine terrain, visitors prioritizing safety, or anyone wanting deeper local insight.
Can I Combine Ringedalsvatnet Viewpoints with the Trolltunga Hike?
Absolutely. Many hikers plan stops at alternative viewpoints around Ringedalsvatnet either on approach or return, providing varied compositions and calmer scenes. Combining viewpoints enriches the visual story while reducing time at the busiest cliff edge.
What Safety Measures Should I Prioritize on the Trolltunga Hike?
Prioritize layered waterproof clothing, sturdy boots, navigation tools, and emergency communication. Check weather forecasts, inform someone of your plan, and consider a guided option if conditions or experience are uncertain. Changing conditions demand caution and flexibility.
Further reading: Visit Norway — Trolltunga and Yr weather forecasts for up-to-date conditions.