


Sunset photography transforms ordinary evenings into cinematic memories, and timing is everything. Sunset photography delivers the richest hues when you capture Santa Monica Pier or Malibu 20–30 minutes after sunset, revealing magentas, deep blues and warm residual light.
Why this matters now: camera sensors, smartphone computational modes and social feeds all reward dramatic, authentic color. This guide shows how to chase peak tones, choose gear, compose for emotional impact, and edit with restraint for Discover-worthy results.
Mastering Light: Why 20–30 Minutes After Sunset Works
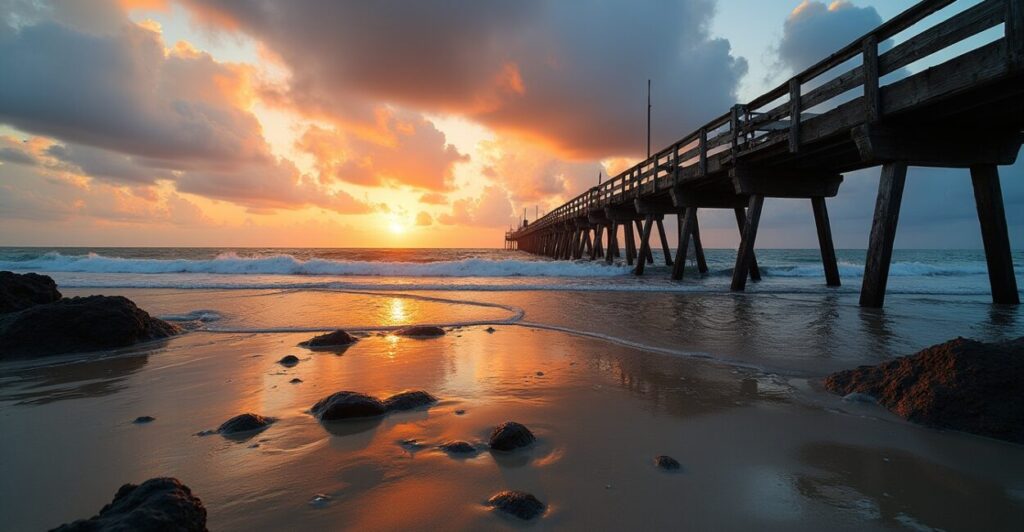
Light shifts quickly after the sun dips. Sunset photography benefits from the blue hour transition, atmospheric scattering, and lingering warmth that deepen colors on pier wood, ocean surface, and clouds.
Science Behind the Glow
Atmospheric scattering and low-angle light lengthen color wavelengths, enriching reds and purples. This produces vivid gradients that sensors capture well with the right exposure and white balance.
Practical Timing Tips
Track civil twilight and plan to stay 20–30 minutes after sunset. Arrive early to scout compositions and lock in tripod position for steady long exposures and sharper tones.
Gear and Settings That Unlock Peak Tones
Choosing the right gear improves your chance for dramatic results. For Sunset photography, use solid tripods, wide-angle lenses, and neutral density if you want silky water and balanced skies.
Essential Camera Setup
Set a low ISO, shoot in RAW, bracket exposures, and use manual or aperture-priority modes to control depth of field and highlight retention for vivid color capture.
Lens and Accessories
Use wide or moderate telephoto lenses for pier and cliff perspectives. Carry ND filters, a remote release, and a microfiber cloth to keep lenses clear of sea spray.
Composition Techniques for Emotional Impact
Composition connects the viewer with what you felt on location. In Sunset photography, leading lines, reflections, foreground interest and human silhouettes amplify mood and narrative.
Foreground and Depth
Add rocks, wet sand, or the pier’s railings in the foreground to lead the eye. This creates depth and makes colors feel immersive and immediate.
Balancing Sky and Land
Use the rule of thirds, but break it when needed. Let dramatic clouds or a glowing horizon dominate, or place the pier across a lower third for weight and contrast.
Practical Workflow: Shoot-to-edit (includes Table)
An efficient workflow keeps moments alive. Capture multiple exposures, mind RAW histograms, and edit with color fidelity to preserve the peak tones you saw 20–30 minutes after sunset.
On-location Checklist
- Scout location and angle before sunset.
- Set camera to RAW and low ISO.
- Bracket exposures and use a tripod.
- Review histograms; avoid clipped highlights.
Post-processing Approach
Start with global exposure, recover highlights, then refine color vibrancy selectively. Use local adjustments to protect skin tones and natural-looking water reflections.
| Step | On-location Action | Post-edit Focus |
|---|---|---|
| 1 | Set tripod, shoot RAW, bracket -2/0/+2 EV | Merge exposure or choose best RAW for dynamic range |
| 2 | Use low ISO, aperture f/8–f/11 for sharpness | Sharpen subtly, reduce noise in shadows |
| 3 | Frame foreground elements and reflections | Enhance contrast, dodge highlights, burn edges |
Local Tips: Santa Monica Pier and Malibu Specifics
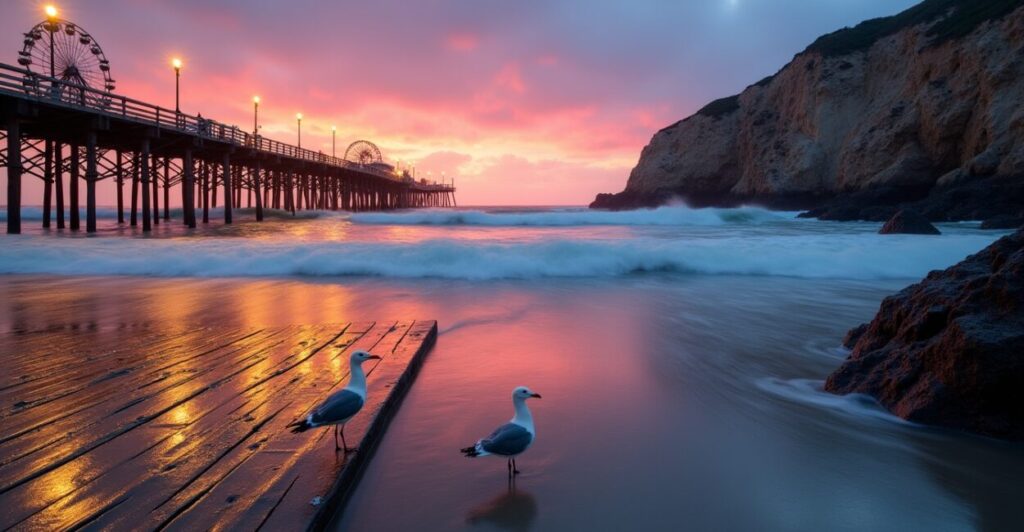
Santa Monica Pier and Malibu present unique compositions: the pier’s lamps and crowds, or Malibu’s cliffs and coves. For Sunset photography, choose the site that matches your emotional intent.
Shoot Spots at Santa Monica Pier
Capture the pier from the west-facing beachfront for silhouettes, or from the pier itself for lamp-lit foregrounds that pop against vivid skies.

Malibu Vantage Points
Try El Matador State Beach or Zuma Beach for dramatic cliff ledges and tide pools that mirror colors 20–30 minutes after sunset with cinematic depth.
Editing Secrets to Preserve Authentic Colors
Editing can either elevate or betray what you saw. For Sunset photography, prioritize color accuracy, subtle contrast, and selective vibrance so tones remain pleasing across devices.
Color Management Basics
Work in a calibrated color space, adjust white balance carefully, and avoid extreme saturation that produces unrealistic skin tones or banding in skies.
Local Adjustments and Finishing
Use graduated filters, radial masks, and targeted HSL adjustments to enhance skies, foreground separation, and to keep highlights from blowing out while retaining mood.
Sharing, Discoverability, and Ethical Considerations
To reach Google Discover and respect locations, craft compelling captions, use alt text, and credit public spaces or local regulations. Ethical shooting helps protect the scenes you love.
Optimizing for Discover and Seo
Write short, emotional captions with keyword-rich alt text. Share high-quality images, and link to authoritative resources to boost EEAT and content longevity.
Respect and Safety
Follow local rules, avoid trampling vegetation or entering private property, and prioritize safety on slippery rocks and during low-light shoots at the pier and cliffs.
Conclusion
Chasing Sunset photography 20–30 minutes after sunset at Santa Monica Pier or Malibu rewards patience with unparalleled tones and emotional resonance. The colors you capture can tell stories that linger.
Return to the hook: those cinematic magentas and deep blues are fleeting—plan, shoot thoughtfully, and edit with restraint to preserve the authentic moment you witnessed.
Frequently Asked Questions
When Exactly Should I Shoot to Catch Peak Colors After Sunset?
Plan to shoot between 20 and 30 minutes after sunset, often during civil to nautical twilight. This window maximizes saturated hues as the sky cools and warm residual light mixes with blue-hour tones. Arrive early to scout and set up gear for steady exposures and bracket for safety.
What Camera Settings Yield the Best Results for Pier and Coastal Sunsets?
Use RAW format, low ISO (100–200), aperture f/8–f/11 for depth, and a shutter speed suited to your tripod or desired motion blur. Bracket exposures and check histograms to avoid clipping highlights while preserving shadow detail for natural, vivid color rendition.
How Do I Protect My Gear and Stay Safe on Slippery Rocks and Near Waves?
Bring a sturdy tripod, lens cloth, and weather-sealed equipment if possible. Wear shoes with good traction and watch tides. Keep a safe distance from waves, secure straps, and avoid risky compositions during high surf or strong winds to protect yourself and your camera.
Which Editing Steps Best Preserve the Authentic Colors I Saw on Location?
Start with global exposure and white balance adjustments, then use selective HSL tweaks and graduated masks for skies. Keep vibrance moderate, recover highlights, and apply local contrast carefully to maintain natural skin tones and prevent color clipping or banding in smooth gradients.
Are There Restrictions or Permits for Shooting at Santa Monica Pier or Malibu Beaches?
Rules vary: Santa Monica Pier has public access but may restrict commercial use without a permit. Malibu state beaches can require permits for paid shoots. Check local ordinances, park websites, and respect posted signage to avoid fines and protect public spaces.
External resources: Santa Monica Pier official site, California State Parks – Malibu beaches, and a practical guide to coastal shooting at B&H Explora.