


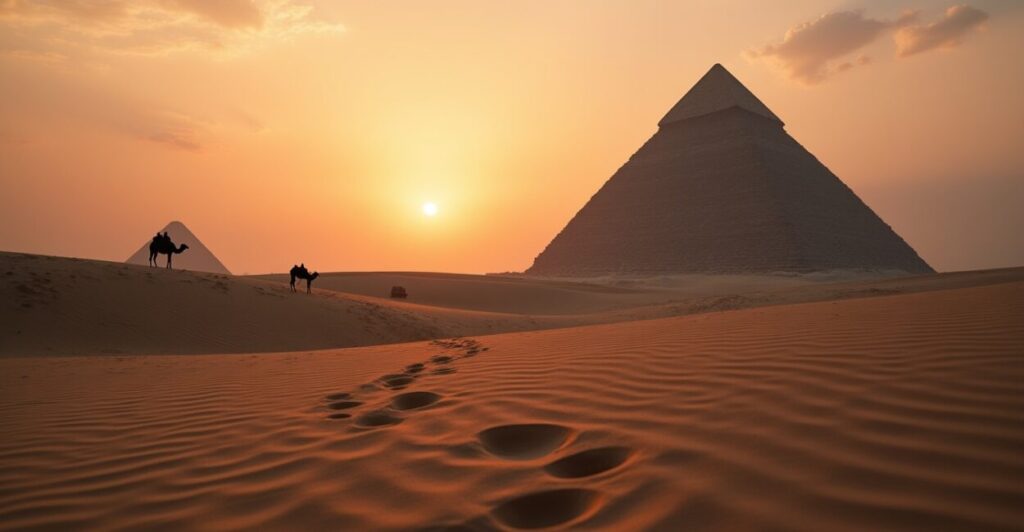
Sunrise over Giza can feel like a private secret: the Great Pyramid outlined in gold, a low-angle frame turning stone into silhouette. Egypt photography tips will help you capture that fleeting dawn drama with clarity and emotion.
This guide explains what makes early-morning Giza shots special, why low-angle framing and silhouette control matter, and how to use composition, exposure, and gear to get magazine-ready images. Read on for practical techniques, camera settings, and creative angles to elevate your travel photography.
Understanding Sunrise Mood and Low-angle Framing
The sunrise mood at Giza blends golden hour warmth, long shadows, and a quiet city backdrop—ideal for silhouette and low-angle framing. Anticipate light direction and rising sun position for dramatic pyramid outlines.
Why Low-angle Works
Low-angle framing emphasizes monumentality, making pyramids appear towering against a clean sky. It isolates shapes and textures while creating strong foreground interest with dunes or stones.
Timing the Golden Hour
Golden hour at Giza gives soft light and rich color that flatters stone surfaces and silhouettes. Track sunrise times and arrive early to scout angles and tripod placement.
Composition Techniques for Iconic Giza Silhouettes
Use rule-of-thirds, negative space, and foreground elements to craft compelling silhouettes of the Great Pyramid and the Sphinx. Egypt photography tips include layering subjects and balancing scale and simplicity.
Frame with Foreground Interest
Include a human silhouette or camel in the foreground to convey scale and emotion. Low-angle positioning makes foreground figures heroic against the pyramid backdrop.
Use Negative Space Effectively
Leave open sky to amplify the pyramid’s shape at dawn. Negative space creates visual breathing room and strengthens the silhouette’s impact.
- Scout a low vantage point near sandbanks or rocks.
- Position the sun slightly behind the pyramid for clean silhouette.
- Use wide-angle lenses to include foreground context.

Gear and Exposure Essentials for Dawn Shoots
Bring a sturdy tripod, a wide-angle and a short telephoto, and neutral density filters for balanced exposures. Egypt photography tips here focus on exposure blending and dynamic range control.
Camera and Lens Choices
A full-frame DSLR or mirrorless gives cleaner high-ISO performance and wider dynamic range for sunrise scenes. Pair with a 16–35mm and a 70–200mm for variety.
Exposure Strategy
Bracket exposures to protect highlights and shadows. Use manual mode or exposure compensation to keep the pyramid silhouette intact without blowing out the sky.
Recommended Camera Settings and Quick Reference
Use low ISO, mid-range aperture, and variable shutter speeds to control depth and motion. Below is a quick table and a step-by-step workflow to nail sunrise silhouettes.
Settings Table
| Situation | ISO | Aperture | Shutter | Notes |
|---|---|---|---|---|
| Pre-sunrise silhouette | 100–200 | 8–11 | 1/60–1/250s | Use tripod, bracket exposures |
| Sun peeking behind pyramid | 100 | 11–16 | 1/200–1/800s | Smaller aperture for starburst |
| Foreground motion (camels/wind) | 200–400 | 5.6–8 | 1/125–1/500s | Freeze action, keep sharp silhouette |
Step-by-step Workflow
- Arrive 45 minutes before sunrise and set up tripod low to the ground.
- Compose with pyramid offset and a foreground element for scale.
- Set ISO 100, aperture F8–11, and take bracketed exposures.
- Review histograms and adjust exposure to protect highlight details.
- Capture at multiple focal lengths for variety and depth.
Creative Low-angle Framing and Storytelling
Turn technical skill into narrative by using low-angle frames to tell human stories—tourists, guides, camels—against ancient silhouettes. Egypt photography tips help you evoke wonder, not just a record.
Make Emotion the Focus
Include a lone figure watching dawn to create intimacy and scale. Low-angle shots make observers feel dwarfed and reverent before the pyramid.
Experiment with Silhouettes and Color
Use the warm sky and cool stone contrast to heighten mood. Slight underexposure preserves color saturation and dramatic black shapes.

- Shoot sequences to capture changing light and mood.
- Mix wide establishing frames with tight silhouette portraits.
- Stay patient—expressive moments often appear between planned shots.
Logistics, Permissions, and Local Considerations
Plan permits, timing, and local guides to access the best low-angle vantage points. Egypt photography tips include respecting site rules, security checkpoints, and cultural norms.
Access and Timings
Check opening hours and sunrise permit rules; some areas restrict tripod use. Arrive early to clear checkpoints and choose safe vantage points without blocking visitors.
Local Guidance and Safety
Hire a licensed guide for insider vantage points and language support. Respect conservation rules, avoid climbing structures, and follow park staff directions.
- Confirm camera and tripod regulations with authorities.
- Carry water, sun protection, and a compact headlamp.
- Tip guides fairly and be mindful of local customs.
Post-processing Tips for Authentic Impact
Enhance contrast, recover shadows, and fine-tune white balance to keep the sunrise atmosphere intact. Egypt photography tips favor subtle edits that preserve realism and emotion.
Developing Raw Files
Start with RAW to recover highlights and shadow detail. Increase clarity and texture sparingly to maintain stone realism while preserving silhouette purity.
Color Grading and Sharpening
Warm the highlights slightly to accentuate dawn. Apply selective sharpening to foreground elements and keep sky noise-free with targeted denoise.
Conclusion
Low-angle sunrise photography at Giza transforms monuments into storytelling silhouettes—where light, scale, and patience create unforgettable frames. Use these Egypt photography tips to plan, shoot, and edit images that feel alive with history and emotion.
Return to the quiet dawn memory: the pyramid’s outline, your silhouette in the sand, and a single frame that captures awe. That’s the reward for thoughtful preparation and creative risk at sunrise.
Faq
When is the Best Time to Photograph Giza for Silhouette Shots?
The optimal window is roughly 30 minutes before to 15 minutes after sunrise when the sun is low and the sky has rich color gradients. Arrive early to scout and set a low tripod position for dramatic silhouettes, allowing time for bracketing and composition adjustments.
What Camera Settings Reliably Capture the Great Pyramid Silhouette?
Start with ISO 100, aperture F8–11, and shutter speed adjusted for exposure bracketing. Use a tripod for stability, slightly underexpose to preserve sky color, and review the histogram to avoid clipping highlights or losing silhouette contrast.
Can I Use a Smartphone to Shoot Sunrise Silhouettes at Giza?
Yes—modern smartphones with wide-angle lenses and manual exposure control work well. Use a stable surface or a small tripod, lock exposure on the sky, and shoot in RAW or HDR mode to retain dynamic range and color for editing later.
Are Permits Required to Use a Tripod or Professional Gear at Giza?
Tripod and professional equipment rules can vary; some areas restrict gear without permits. Check official site regulations, hire a licensed guide if unsure, and arrive early to clarify permissions with onsite staff or security personnel.
How Do I Compose to Show Scale Between People and Pyramids Effectively?
Position a person or camel in the foreground at a low angle to emphasize the pyramid’s scale. Use wide lenses up close to the subject for dramatic perspective or longer focal lengths to compress distance and highlight proportional contrast.
Further reading: UNESCO guidance on cultural sites whc.unesco.org, travel tips from Lonely Planet Lonely Planet, and technical tutorials from a leading camera maker Canon.